

Submitted Want Ads are reviewed by the University Communications staff from 8 a.m. to 5 p.m. on weekdays. Want Ads submitted during the weekend will be approved on Monday mornings.
Important Information
The Today at Elon Want Ads section is provided as a service to members of the Elon community. Notices can be posted only by Elon students, faculty and staff, but anyone outside the Elon community can view these notices on the web site. Elon University is not a party in any transactions related to this site, and makes no guarantee concerning the quality of items listed here or the accuracy of information provided about these items.
Want Ads may not promote products or services of a business or an ongoing commercial activity or enterprise run by an individual. Postings should be of interest and benefit to members of the Elon community and must comply with all university policies.
Want Ad Basics
- Visit www.elon.edu/news and log in with your Elon email user name and password. The log in button is on the header of the page:

- Click “Want Ads” in the main navigation menu:

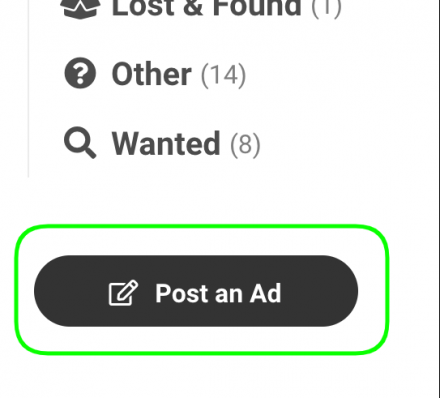
- Click “Post an Ad” in the right sidebar, below the Want Ad category filter:
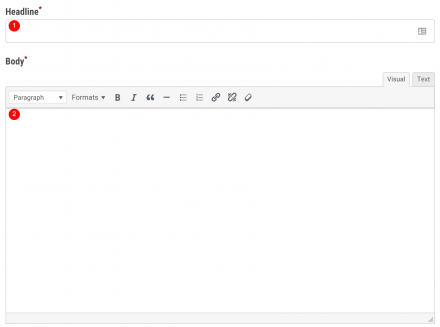
- Enter the ad’s Headline (1) and write the article in the Body section (2):
- Enter the asking price, if applicable, and set the category you’d like the ad to display in:

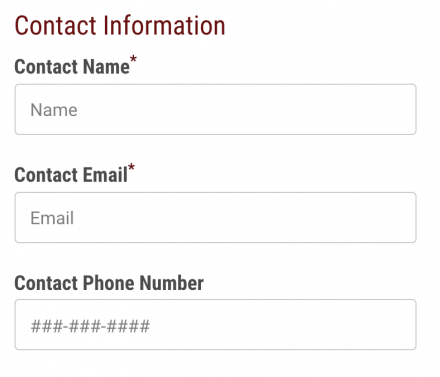
- Enter your contact information. (Name and email address are required.)
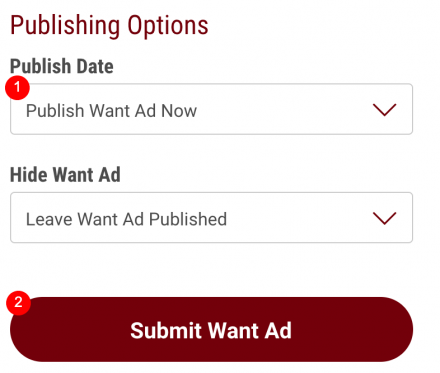
- You may schedule your ad to publish at a future date (1), or immediately submit your ad for approval (2):
Adding Images
- Add images to your ad by clicking “Add to Gallery” button.
- After clicking the button, drop a file or files anywhere to upload, or select a file from a specific location on your computer.
- If you have previously uploaded an image, you may select it from the Media Library.
- Once all your images are selected, click “Choose Images”.
Example
