Manage Filter Groups and Terms
About Filter Groups and Terms
Filter groups and terms help organize your resources into categories users can browse or filter by. For example, a group like Audience might include terms such as Students or Faculty and Staff. You can add, edit or remove both groups and terms in the WordPress Dashboard. Depending on your Resource List settings, filter groups can be used to create dropdowns that help visitors narrow down results.
Filter Groups
Filter groups define the types of categories used to organize your resource terms. These groups can appear as dropdown filters in Resource Lists if filters are enabled and the group is selected in the component’s settings.
This screenshot shows the screen used to add or edit a filter group. The steps below explain each part.
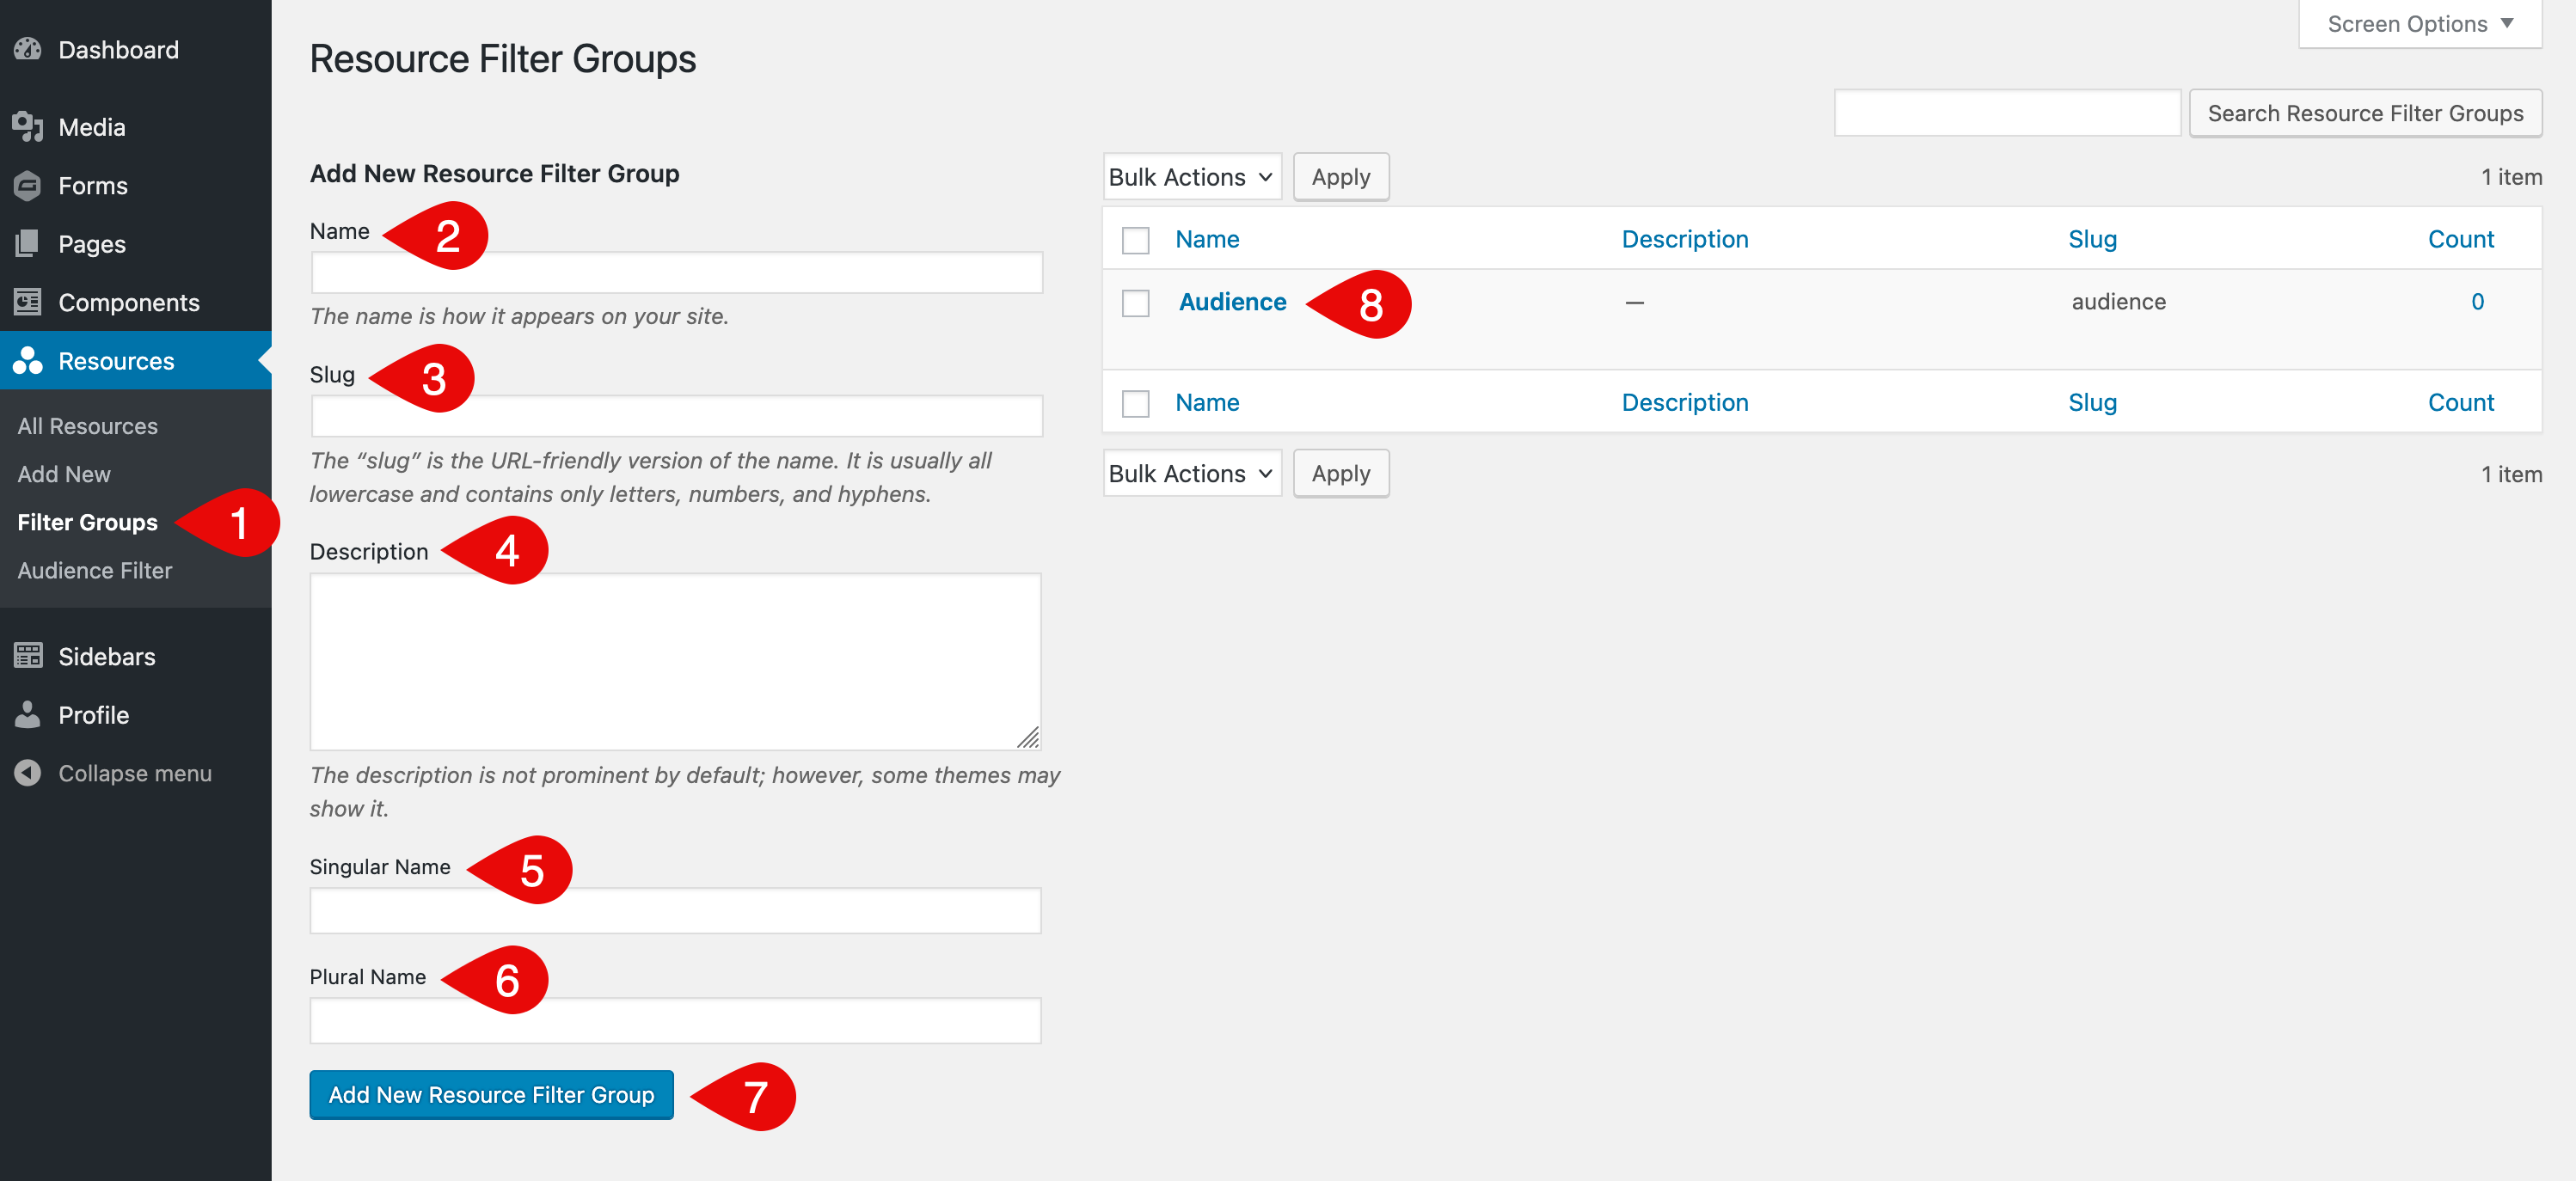
- Filter Groups menu: In the admin menu on the left side of the Dashboard, click Filter Groups under the section labeled for your resources (for example Resources, Documents, Policies or another name your site uses).
- Name: Assign a name for your filter group. This name appears anywhere the group is referenced on the front end or in the WordPress admin, including as the label for dropdown filters in a Resource List, unless a Singular Name is set.
- Slug: The URL-friendly version of the name. WordPress will automatically generate this if left blank, which is preferred.
- Description: This field is not used for filter groups and can be left blank.
- Singular Name (optional): Allows you to override the Name with a custom label. In most cases, the Name is fine as-is, but this field is available if you want a shorter or more user-friendly version. For example, if the Name is HealthEU Dimension, you might use Dimension as the singular label.
- Plural Name (optional): By default, the plugin adds an “s” to the Name (or Singular Name, if set) to create a plural label. Use this field only if that default plural is incorrect. For example, if the Name is Category, enter Categories here.
- Add New Filter Group: Click the button at the bottom of the form to save your new group. The button label may vary depending on the name of your resource section (for example Resources, Documents or Policies).
- Edit an existing group: Click a group name in the table to make changes.
Terms
Terms are the individual options that belong to a filter group. These are the values users can select when filtering a Resource List. Each group manages its own terms, which can be added, edited or removed as needed.
This screenshot shows the screen used to add or edit a term. The steps below explain each part.
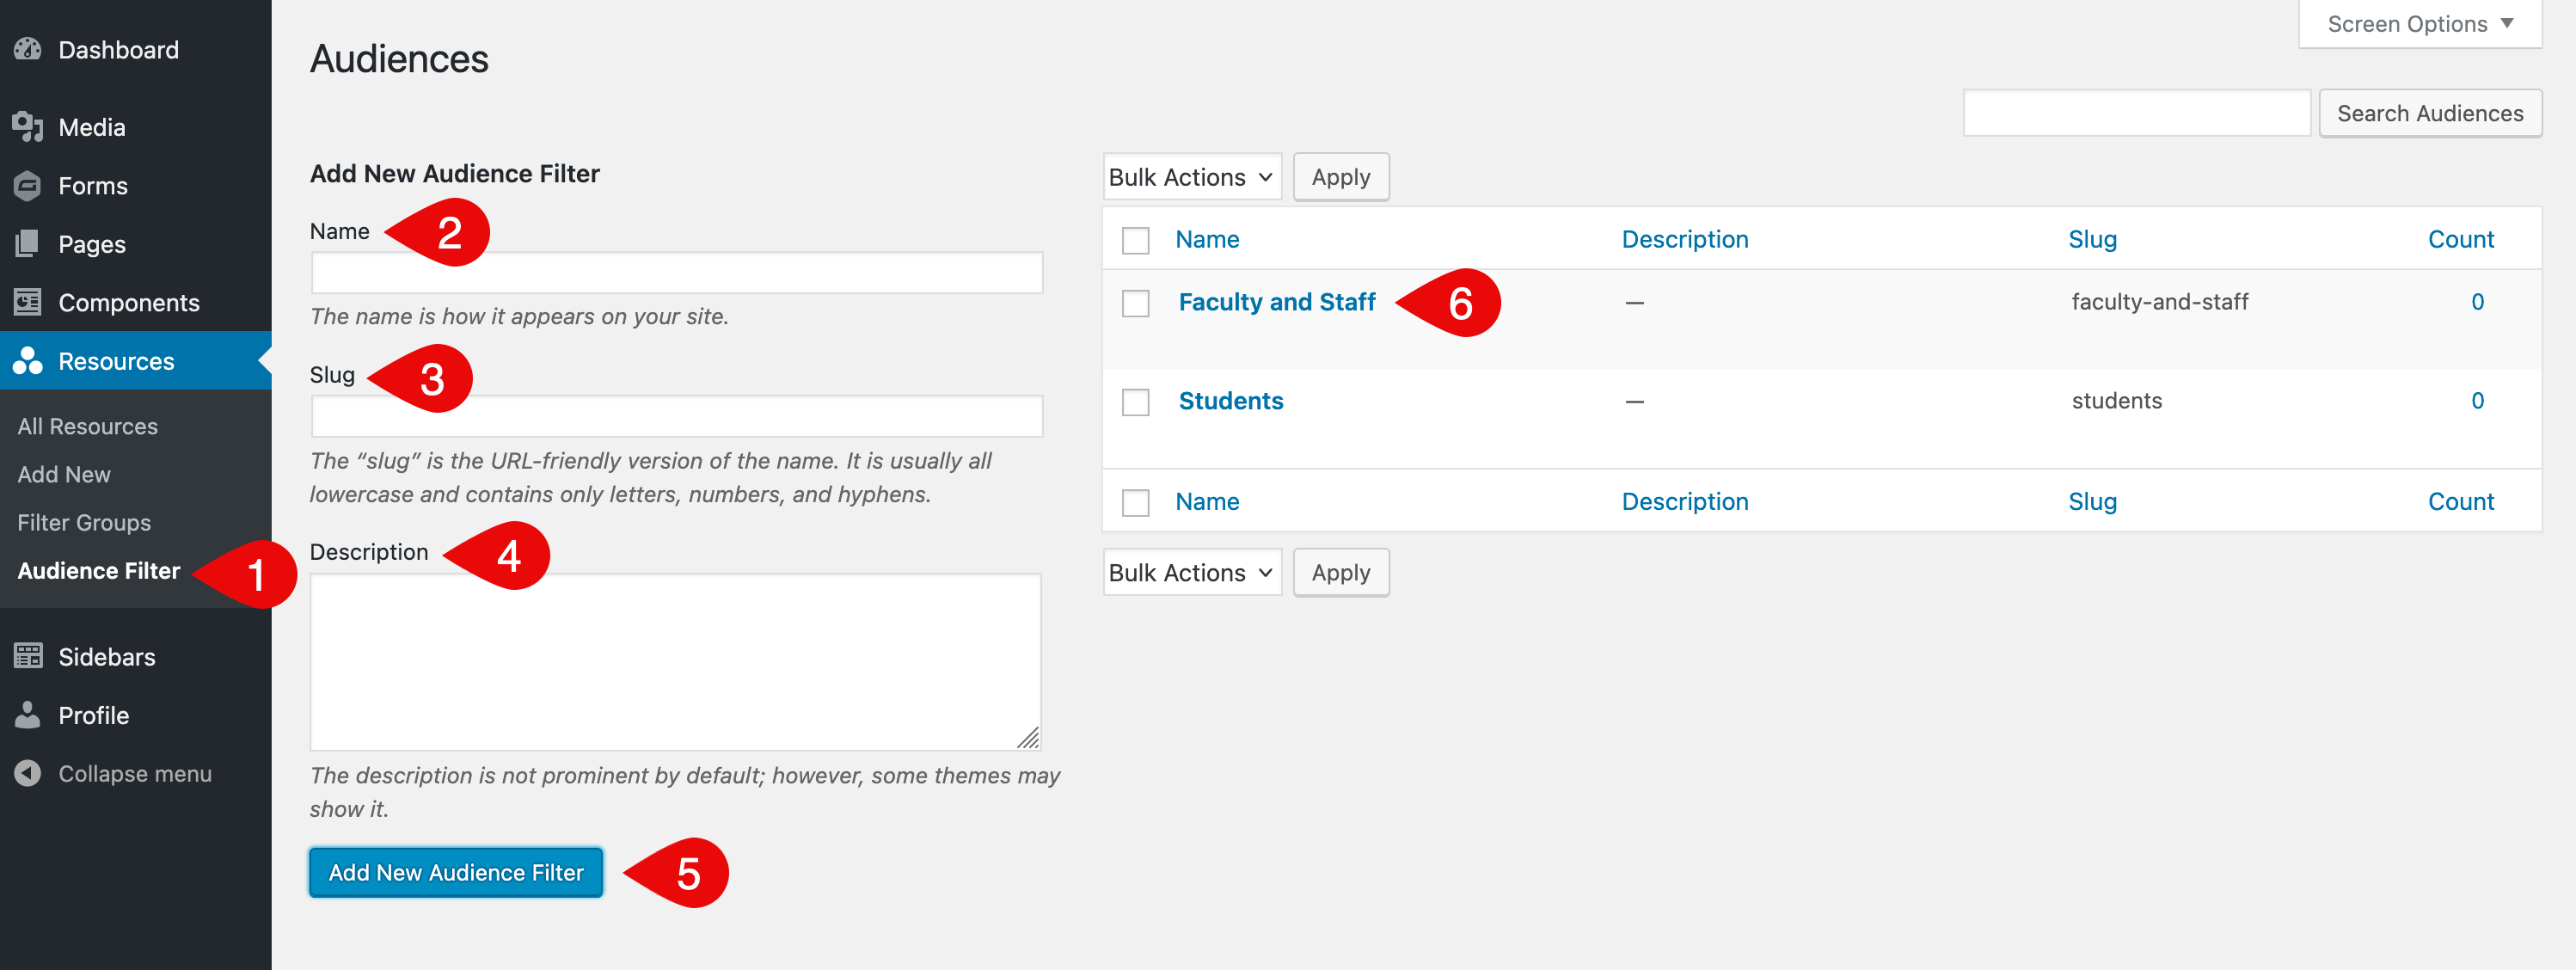
- Filter Group Terms menu: In the admin menu on the left side of the Dashboard, click the filter group name (for example Audience Filter, Topic Filter or Type Filter) under the section labeled for your resources.
- Name: Enter the name of the term. This is what users will see in the dropdown filter if the filter group is displayed in a Resource List.
- Slug: The URL-friendly version of the name. WordPress will automatically generate this if left blank, which is preferred.
- Description: This field is not used for terms and can be left blank.
- Add New Term: Click the button at the bottom of the form to save your new term. The button label may vary depending on the name of the filter group.
- Edit an existing term: Click a term name in the table to make changes.
What’s Next
Once you’ve set up your filter groups and terms, the next step is to add resource items. You’ll be able to assign your terms to individual resources to help organize and display them within Resource Lists on your site.